You have no items in your cart.
Where are my crafters at? 🙋🏻♀️🙋🏻♀️🙋🏻♀️ Would you be surprised if I told you I really don’t care for crafting? Furniture is one thing; it’s big, it’s fun, and its super rewarding! Small crafts? Not really my thing. BUT my family is kind of into homemade gifts and I do enjoy creating something unique for my mom, my Nonna, my in laws, and even my friends. Originally I wanted to make these ornaments. I got about 5 ornaments from the dollar store and had a TON of trail and error. This was my first time working with molding material on curved surfaces. Once I figured out what to do the Dollar Store was sold out of the ornaments I needed! I checked 4 stores. So I decided to change up my plan. Its was like it was meant to be, because the craft I’m about to show you is WAY better than the ornaments! Just sayin’!

This post contains affiliate links. You don’t pay any more from ordering from these links but I earn a small commission so I can continue to bring you more fun projects! They also allow me to show you exactly what I use so you know what I’m referring to!
Material List:
- Plastic Jar (I got mine at the dollar store)
- E6000 Glue
- Modeling Material
- Silicone Mouds
- Chalk Mineral Paint in color of your Choice
- Gilding Waxes
- Old Wood knob or piece of hardware
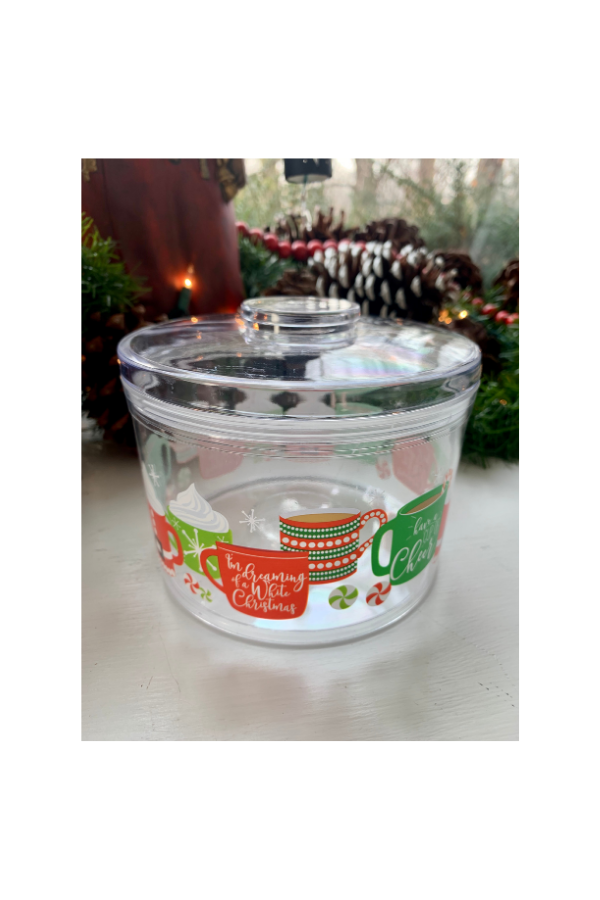
First I started off with a round plastic pod. I think they are made for cookies. I got them at the dollar store.
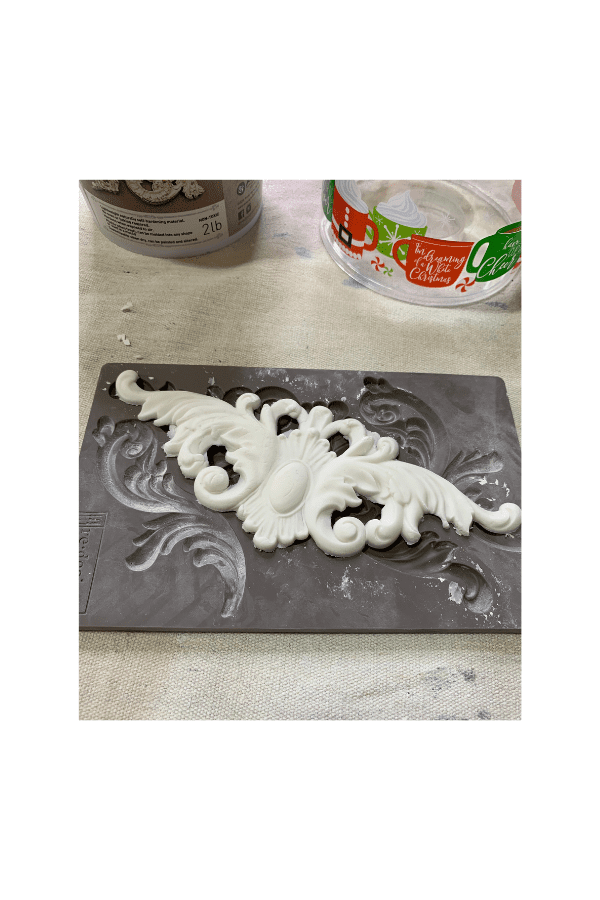
I started this creation by making molds in my silicone forms with my moulding material. (I prefer this modeling material because it is easy to use.) I rolled it in my hands like play dough to warm it up. Then I smushed it into the silicone mould and took it out right away.
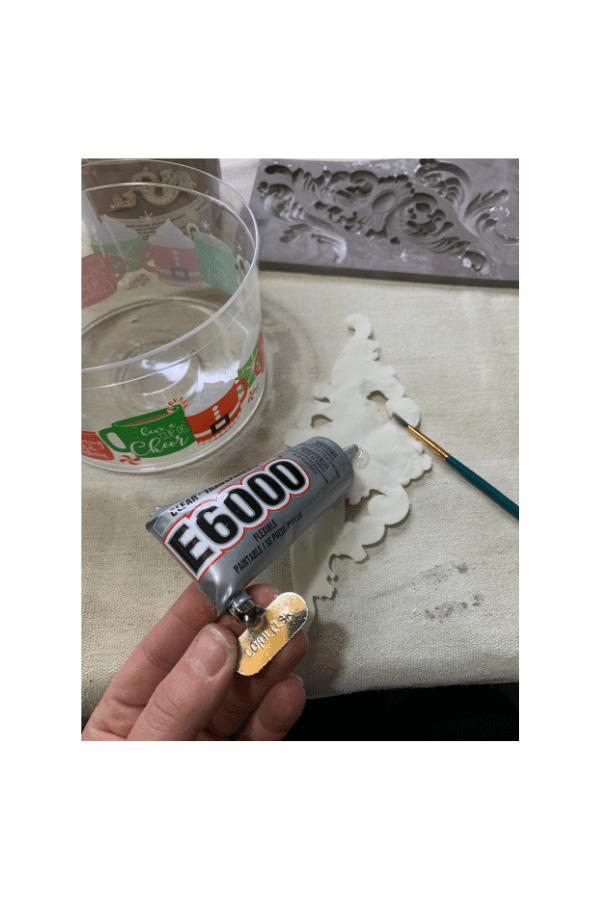
While the moulding material was still wet, I used E6000 glue to apply it to the jar. Next, I used painters tape to secure it in place and let it dry overnight. In the morning, I noticed the material under the tape was still wet. I removed the tape and let it dry completely. I also used E6000 glue to attach an old wood knob from a dresser to the top as a handle and added moulds to the top too.
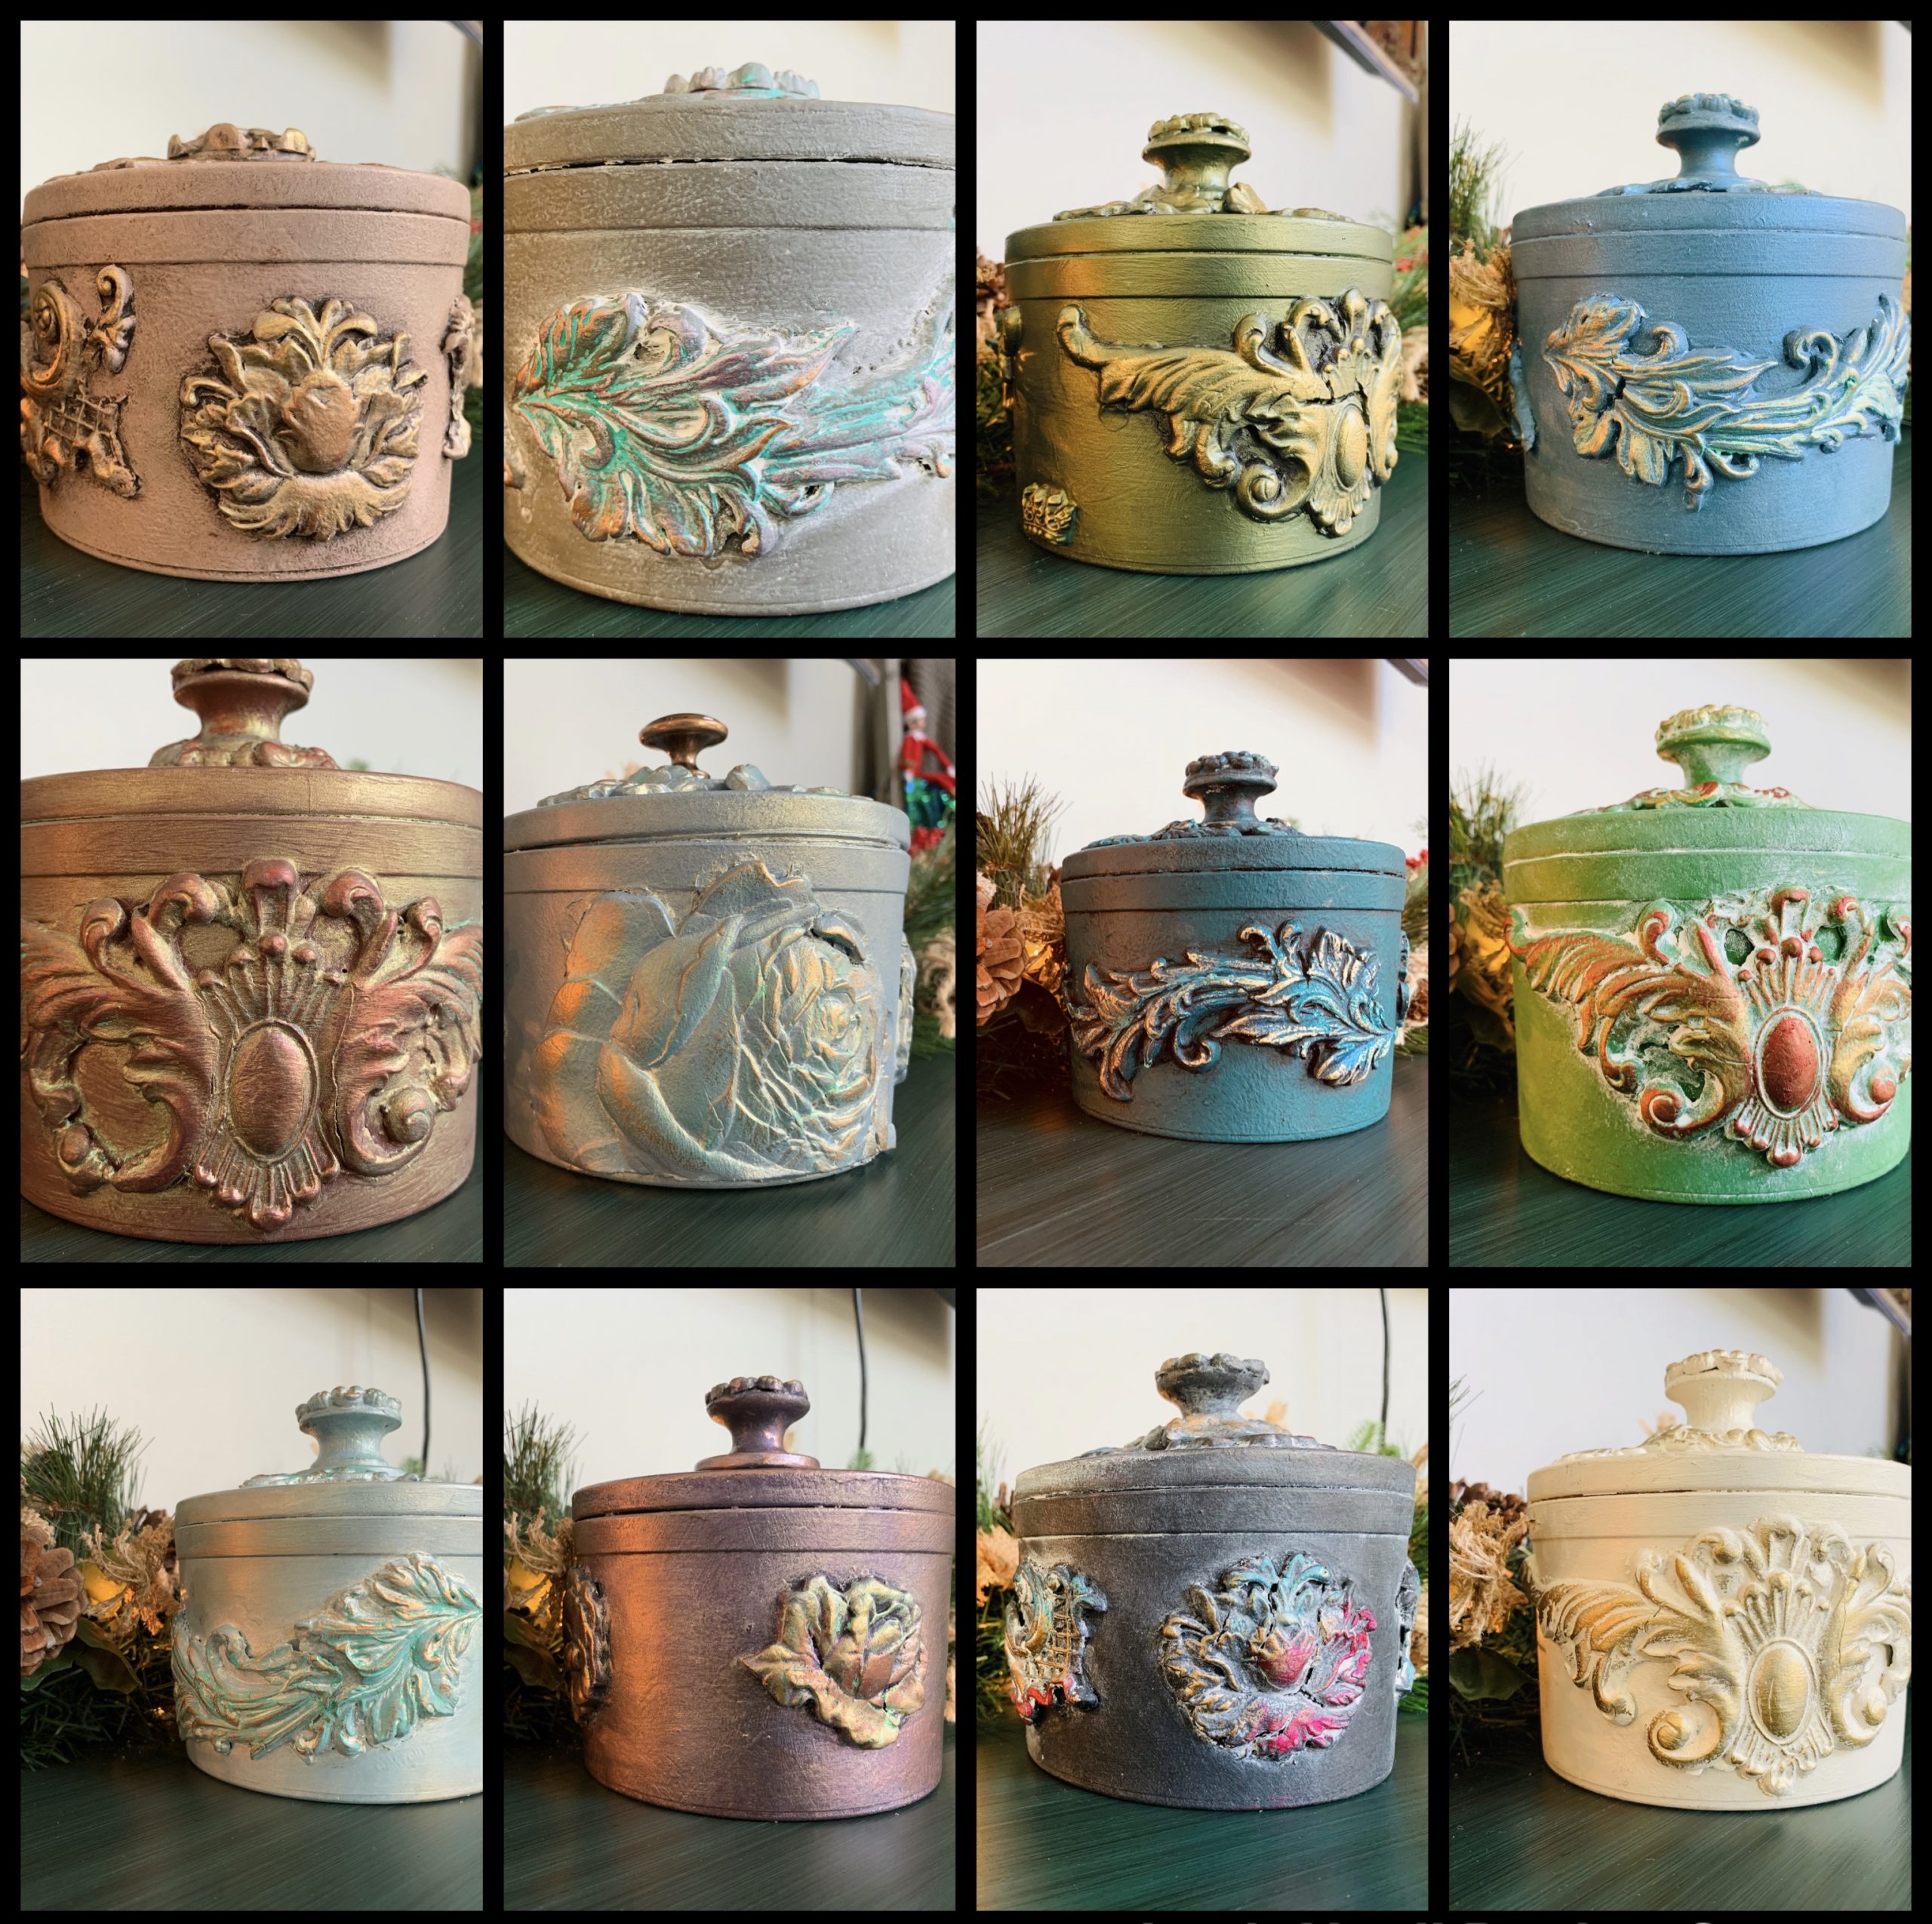
I spent a full day doing all the moulds. The ones I used are called Thornton Medallion (pictured up top), Etruscan Rose, and Baroque Swirls (on the lid). You can find a good selection of these silicone moulds here.The next day I used chalk mineral paint from Dixie Belle to paint each pod a different color! No need to prime– this paint will stick to the plastic AND the molding material! I used 2 coats of paint on each, letting them dry thoroughly between coats. Instead of painting like I normally would for a smooth finish, I dabbed my brush or stippled my brush to create a textured finish. It helped create a stone finish look.
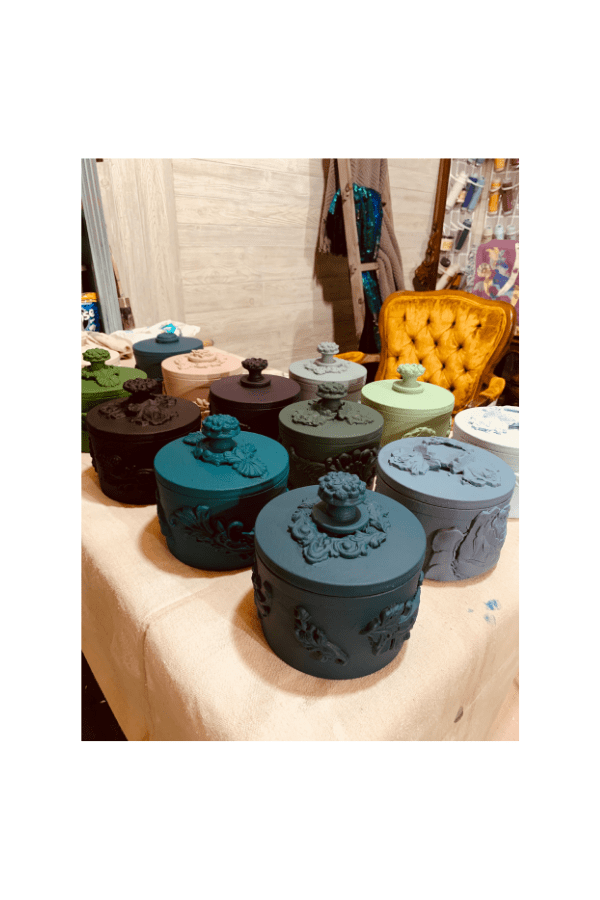
The last step is the most fun step! Applying the decor waxes. I have a lot of gilding waxes from Dixie Belle and Redesign with Prima. I went all out and used different colors! I really can’t tell you how to do this part. You have to let your creative juices flow. I did however do a couple facebooks lives on this process. You can see how to create the molds and how to apply the waxes here. If you just want to see the waxes, you can click here.
Christmas is only five days away and I can’t wait to give these little pods away! You can see the grid of all the ones I created right here!
